
|
 03-31-2011
|
#111 |
 Join Date: Jul 2010
Location: Woodstock, Ontario, Canada
Posts: 1,275
|
There was a GM bulletin that went around to dealerships stating that GM would not warranty engines in which Scotchbright pads were used.
Obviously not an issue if the engines is washed well after use. Thanks for posting all the pics, good work. peace Hog |

|

|
|
04-01-2011
|
#112 |
|
Join Date: Jun 2010
Location: back in lone pine
Posts: 591
|
are you going to time the cams yourself?????
|
|
|
|
|
04-01-2011
|
#113 | |
|
Join Date: May 2008
Location: Mauriceville, Texas
Posts: 179
|
Quote:
Thanks,
__________________
Clint aka billybaloneey '94 - C4 ZR-1 #445 - Black/Black '05 - C6 silver/black 6sp '85 - C4 white/graphite (almost done) automatic '78 - C3 silver/black (a work in progress) automatic |
|
|
|
|
|
04-01-2011
|
#114 |
 Join Date: Mar 2004
Location: Found Member
Posts: 4,346
|
Great idea Clint.
__________________
Frank Urbo. NCM Lifetime member # 982 Registry Founding # 237 |
|
|
|
|
04-01-2011
|
#115 | ||
|
Join Date: Apr 2009
Location: Prather, CA
Posts: 809
|
Quote:
In Haibeck's timing article (and I'm sure most of you already read it), he mentions that when he checked the timing of his stock '93 LT5 with 33K miles, 3 of the cams' timing were retarded by about 4 degrees (because of timing chain & guide wear). But his left exhaust cam was timed right on, apparently that cam was installed 4 degrees out of phase compared with the other 3 when the engine was assembled. By re-timing his LT5 correctly, he gained 10 torque and 8 horsepower. The torque and horspower improvements also span the entire 4000RPM before the 6300RPM point. He said in the article that he is constantly aware of the improvement when driving his Z. Quote:
__________________
[IMG]http://i13.photobucket.com/albums/a292/bdw18_123/_zr1netforumsigphoto.jpg[/IMG][B] 1990 Corvette ZR-1 [/B][I] White/Flame Red, #2299, mostly stock, 144K miles.[/I] -Cams timed to the '93-'95 405HP LT5 stock timing. -IAT sensor relocated to below front bumper. -Haibeck hoops installed in airduct. -OBX cat-back exhaust. [COLOR=DarkRed][B](SOLD - December 2012 [/B][/COLOR][COLOR=DarkRed][B]:hello:)[/B][/COLOR] 1993 Corvette Coupe Black/Black, 6-speed (SOLD - October 2009 :hello:) Last edited by bdw18_123; 04-01-2011 at 03:54 PM. |
||
|
|
|
|
04-01-2011
|
#116 |
 Join Date: Mar 2007
Location: Crystal Lake, IL
Posts: 7,194
|
Clint its in the videos I sent you copies of
__________________
LGAFF 90 #966-150K miles-sold 92 #234-sold 1987 Callaway TT #17 1991 ZR-1 #1359 |

|
|
|
04-07-2011
|
#117 |
|
Join Date: Apr 2009
Location: Prather, CA
Posts: 809
|
Up next is getting the timing guides, chains, gears & cams in place.
First I installed all the secondary chain guides. I cleaned the bolt threads and bolt holes so the loctite would be able to grip. As for the 'bolt hole is larger than the bolt' issue with the top of the two fixed guides, according to Jerry, there are no bushings for those two holes. They are supposed to be larger like that. So I just put them in and let the guides rest on the bolts. 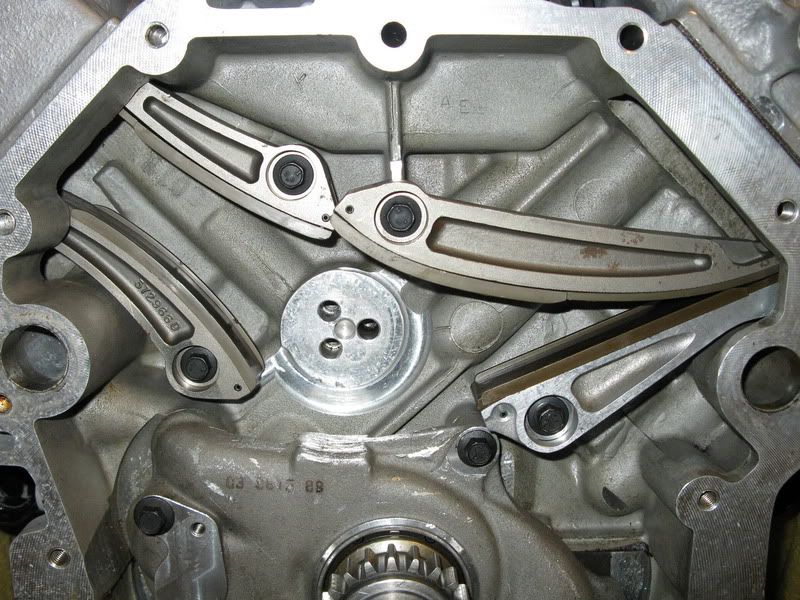 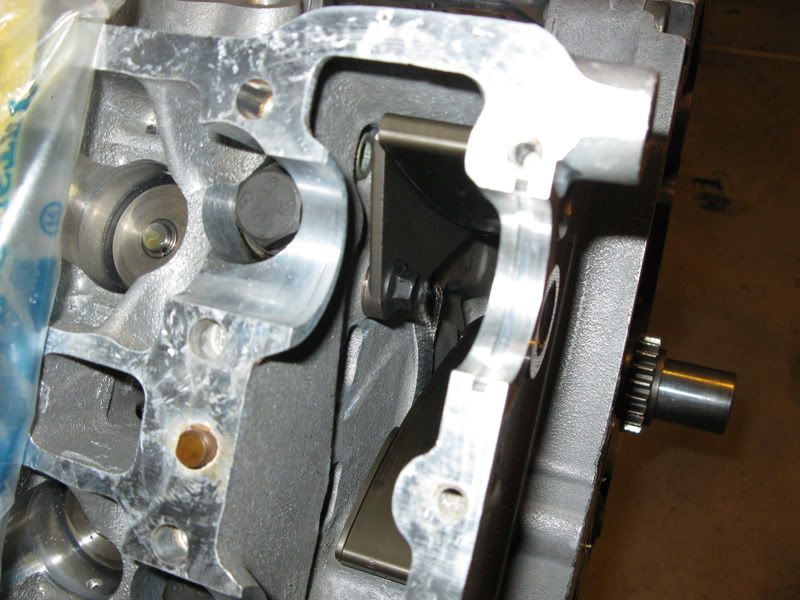 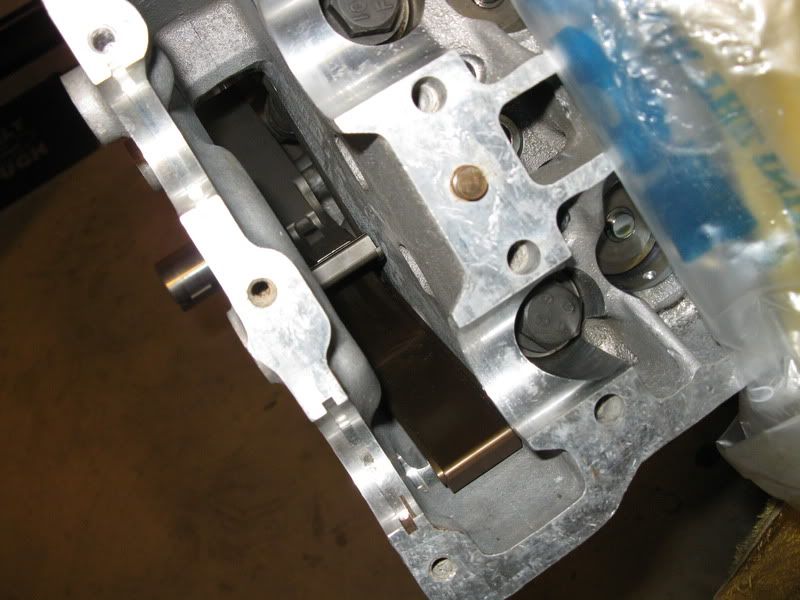 Next, I put the idler gear and the passenger side secondary chain in (the shorter secondary chain). The idler gear has a pin on the back that goes into a hole where the gear mounts. This keeps the gear centered on the mounting area, but also holds it in place while you put the chains on without having the bolts in. I first put the chain around the gear, put the gear in place and then fed the chain up through the head and held the chain in place with my "special J tools" (screwdriver handles - LOL) 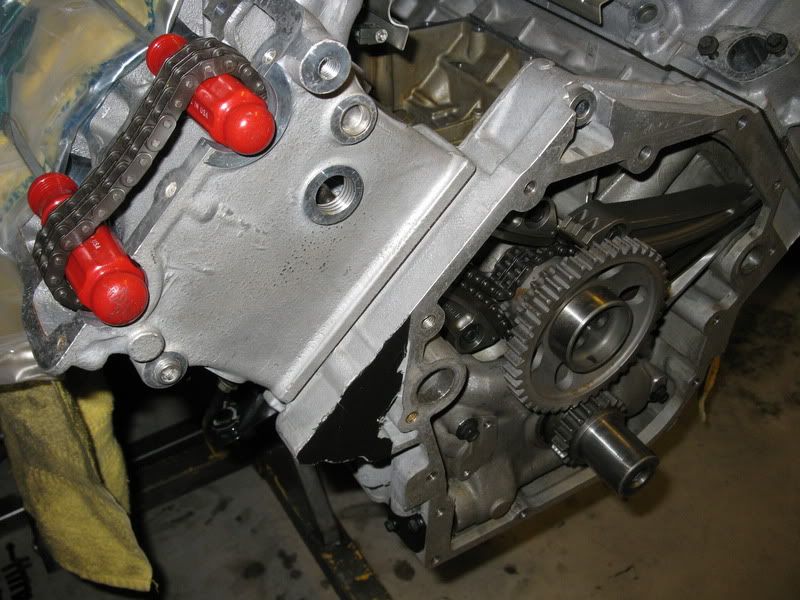 To get the longer, driver's side chain in, you have to pull the gear forward to be able to get the chain around the gear as shown in this picture. 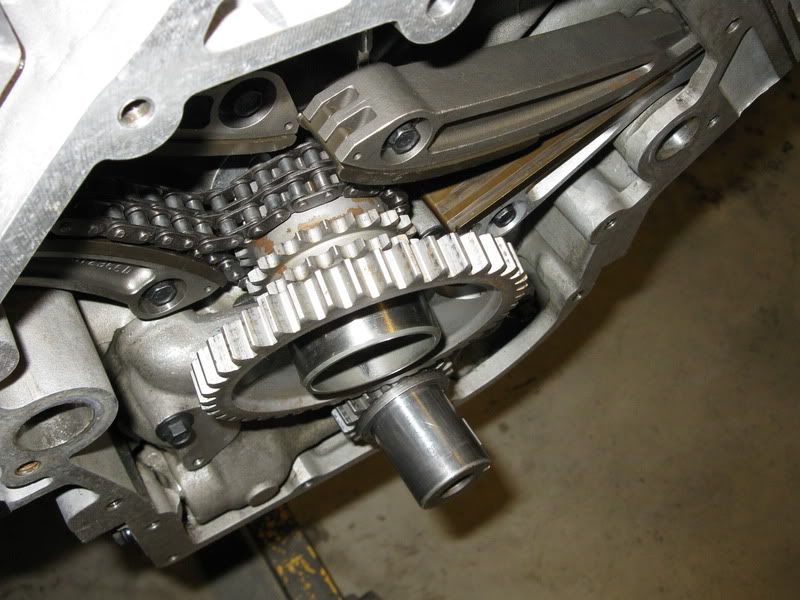 Once I got the chain around the idler gear, I fed the chain up between the guides and through the drivers head. I had to bunch up the chain between the guides first to get it up through the head because of it's length. Once I got the chain up through the head, I held it in place with two more screwdriver handles. 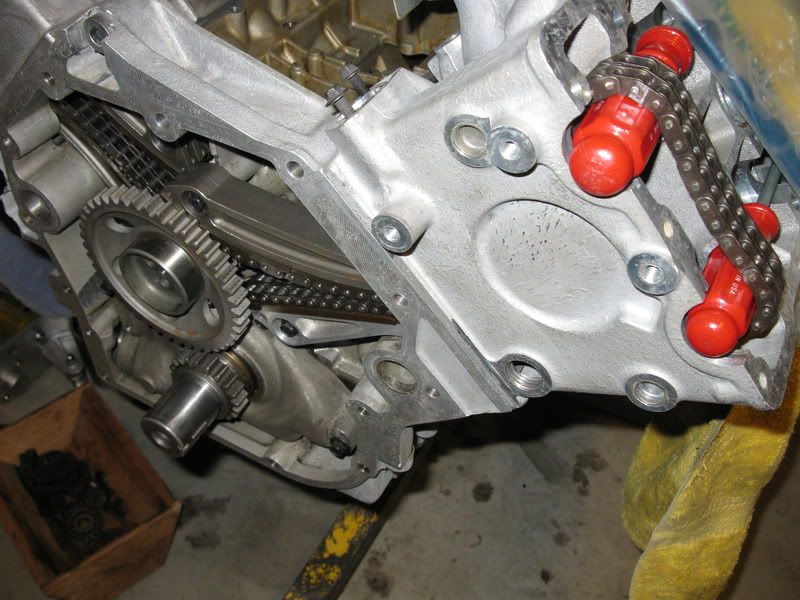
__________________
[IMG]http://i13.photobucket.com/albums/a292/bdw18_123/_zr1netforumsigphoto.jpg[/IMG][B] 1990 Corvette ZR-1 [/B][I] White/Flame Red, #2299, mostly stock, 144K miles.[/I] -Cams timed to the '93-'95 405HP LT5 stock timing. -IAT sensor relocated to below front bumper. -Haibeck hoops installed in airduct. -OBX cat-back exhaust. [COLOR=DarkRed][B](SOLD - December 2012 [/B][/COLOR][COLOR=DarkRed][B]:hello:)[/B][/COLOR] 1993 Corvette Coupe Black/Black, 6-speed (SOLD - October 2009 :hello:) |
|
|
|
|
04-07-2011
|
#118 |
|
Join Date: Apr 2009
Location: Prather, CA
Posts: 809
|
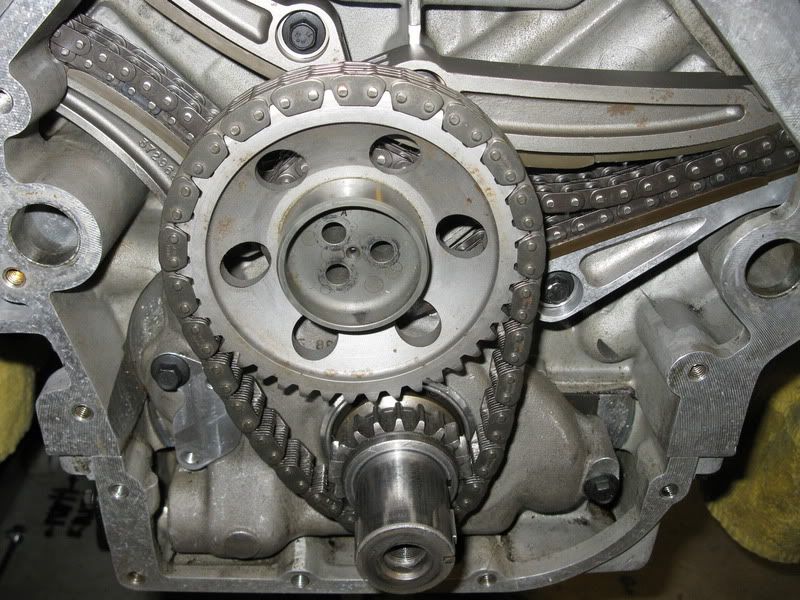
To get the primary chain on, I pulled the idler gear forward again and let the secondary chains hold it. I found you have to put the primary chain on the idler gear first and then put it around the crank gear. Then, while keeping the chain meshed onto the bottom of the crank gear with one hand, I put the idler gear back in place with the other.
 I then installed the idler gear bolts with red loctite and torqued to spec. The primary chain guide/tensioner went in next. The service manual says to only use finger pressure to tension the guide against the primary chain and remove the slack in the chain while tightening the adjusting bolt. 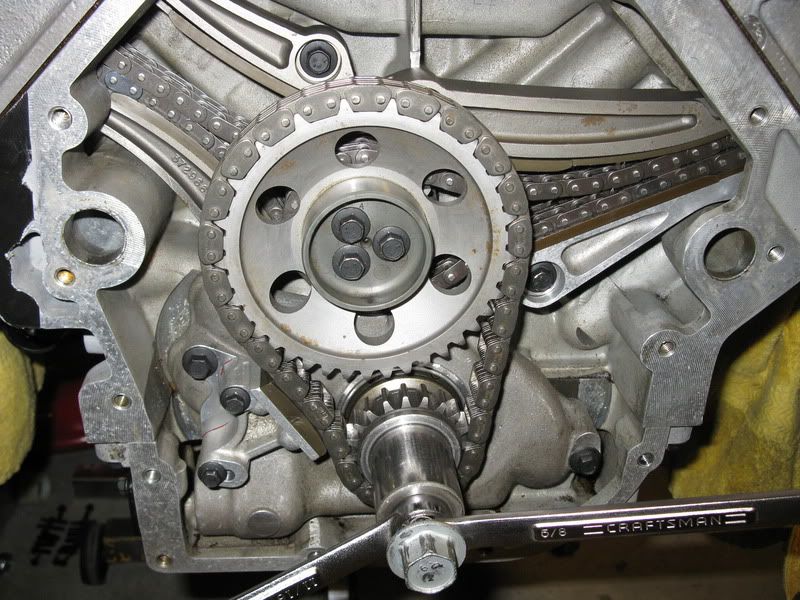 The lifters went in next. I cleaned and applied special assembly lube to them before setting them in place. I numbered all the lifters and took pictures before I originally removed them so that each one would go back to the same spot it came out of. 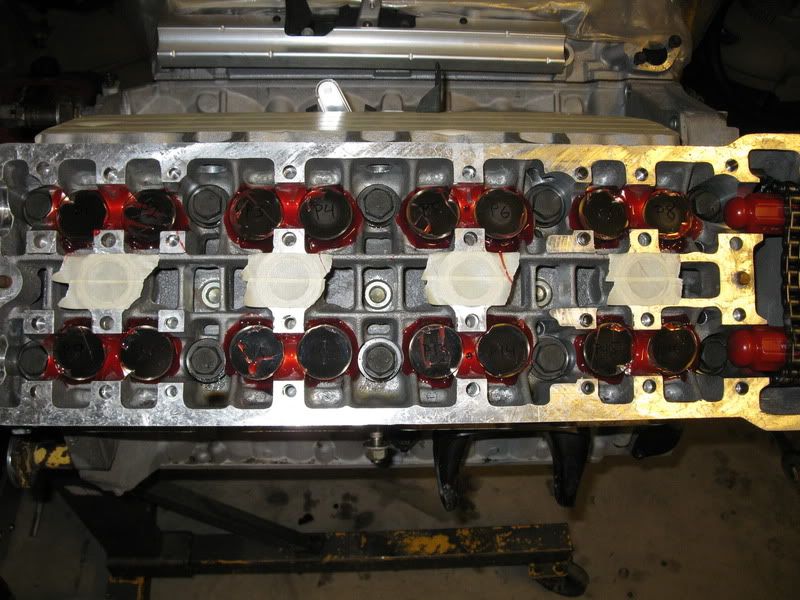 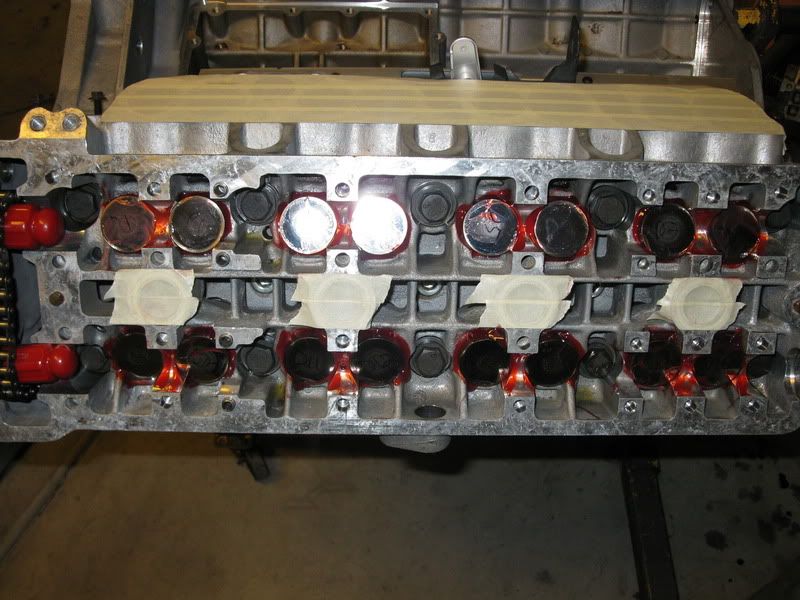 Time for the cams and cams gears to be put into place. The manual says to install the cams in a neutral position so that they won't be opening any of the valves (this is only for installation; they won't stay in that position for timing part). At first glance, it almost looks like the cams don't have a neutral spot, but they do. According to the manual, first you put the cam gear in place under the chain, then while holding the gear under the chain, slide the cam into the gear and set the cam in place onto the head. The flat side of the cam gear must face the camshaft.  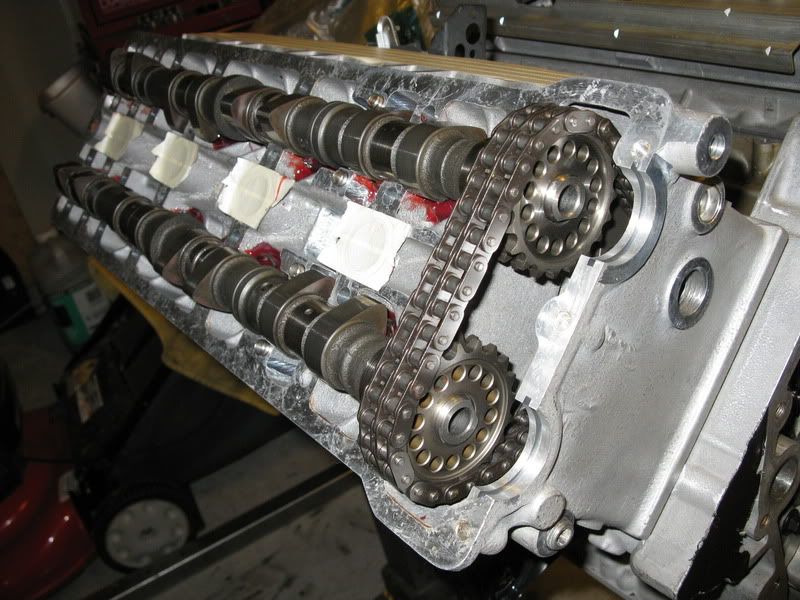
__________________
[IMG]http://i13.photobucket.com/albums/a292/bdw18_123/_zr1netforumsigphoto.jpg[/IMG][B] 1990 Corvette ZR-1 [/B][I] White/Flame Red, #2299, mostly stock, 144K miles.[/I] -Cams timed to the '93-'95 405HP LT5 stock timing. -IAT sensor relocated to below front bumper. -Haibeck hoops installed in airduct. -OBX cat-back exhaust. [COLOR=DarkRed][B](SOLD - December 2012 [/B][/COLOR][COLOR=DarkRed][B]:hello:)[/B][/COLOR] 1993 Corvette Coupe Black/Black, 6-speed (SOLD - October 2009 :hello:) |
|
|
|
|
04-07-2011
|
#119 |
|
Join Date: Apr 2009
Location: Prather, CA
Posts: 809
|
Time now to get ready for the biggest job with regards to rebuilding an LT5 - the timing process. First I had to make several special tools that are needed for the timing the LT5. So far, I have been able to find work-arounds for every special tool called out in the manual. I am going to be timing my LT5 as described in Mark Haibeck's LT5 timing tech article (available on his website - www.zr1specialist.com) and in conjunction with the GM LT5 Service Manual Supplement.
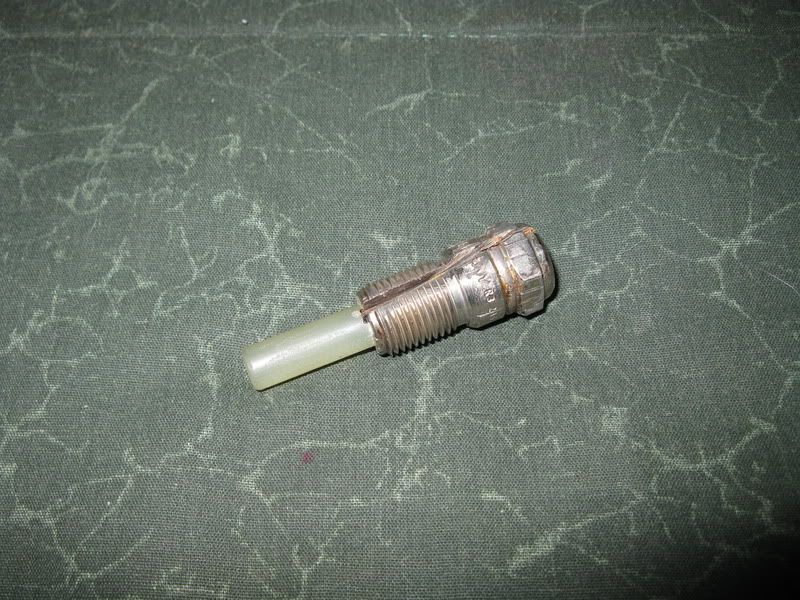
First, I came up with a way to temporarily modify the stock cam retainers to make them hold the cams as tightly as the cam cover does since I don't have those special tight-fitting hold down clamps. I happened to have some special plasticy anti-scuff tape stuff (you can see the roll in on of the pictures below). I don't even know what it's called, but it was perfect for what I needed it for. I set one of the rear retainers on top of one of the bearing surfaces of one of the cam covers so I could see what the difference in size was. As you can see in the following picture, there is quite a bit of difference in size between the cam cover bearing surface and the retainer. 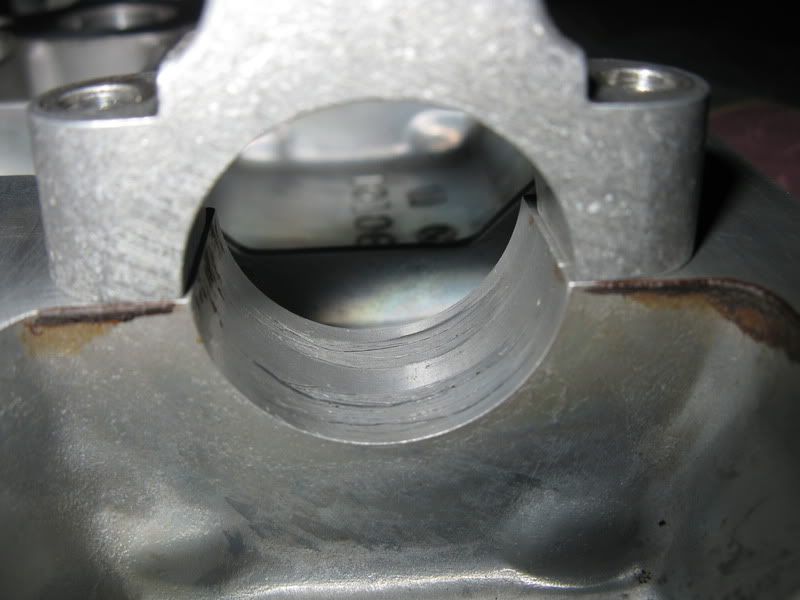 So all I did was to apply layers of that special plastic tape stuff to the retainer until it was the same as the cam cover bearing surface, which ended up being 3 layers of the tape. I did this to all of the cam retainers. In Haibeck's LT5 timing article, he says the difference is around .010, but I found that it is actually closer to .020. 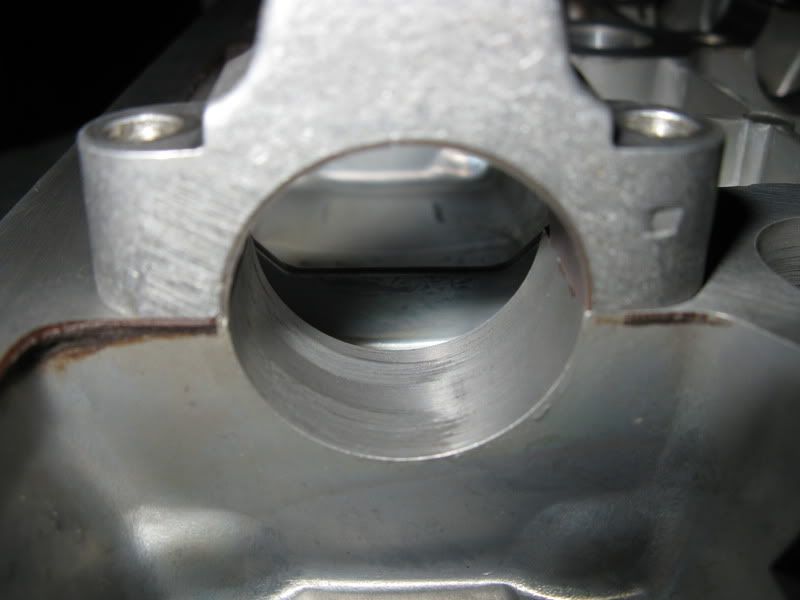 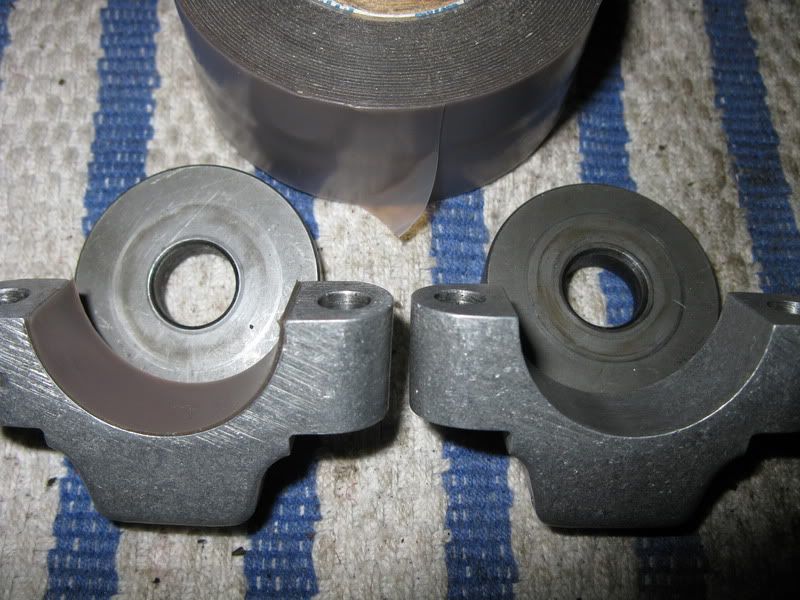 Next, I fabricated a couple of manual cam chain tensioners out of some aluminum L-stock I had and a couple of long bolts. 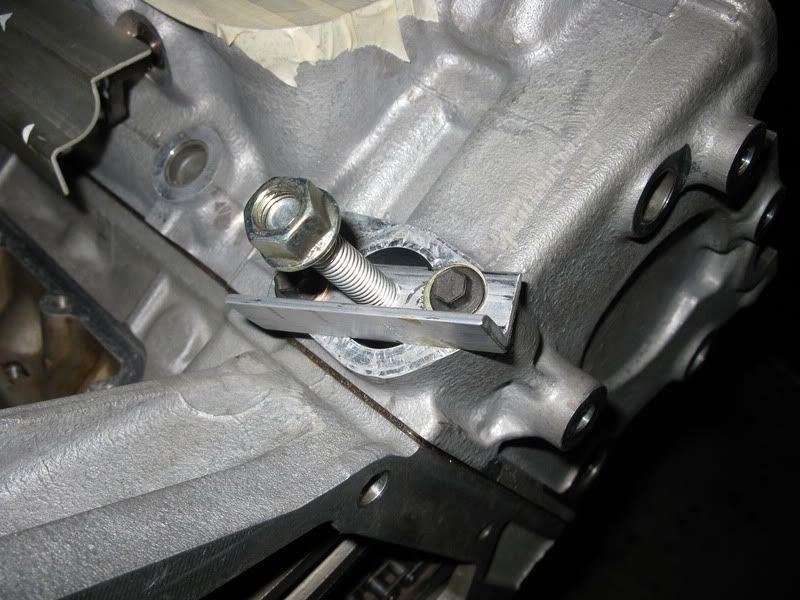 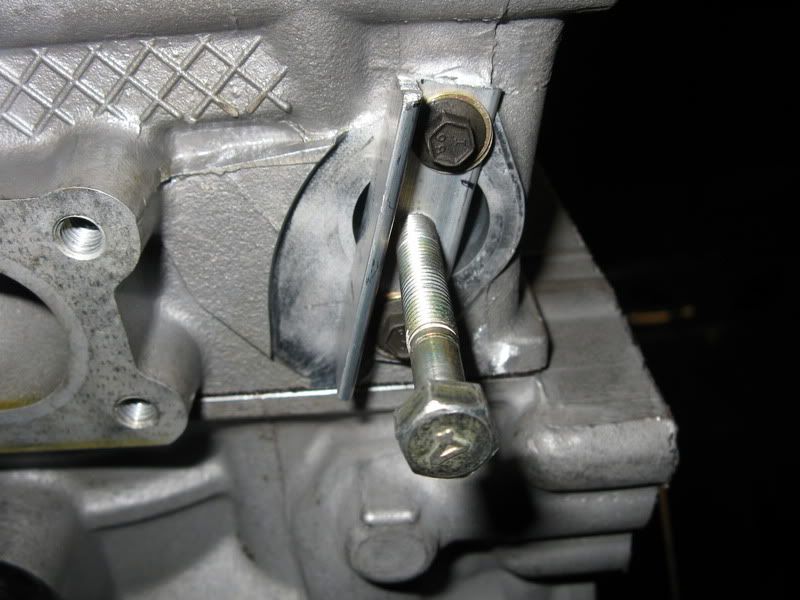 I also made a timing wheel and a positive piston stop tool. For the timing wheel, I printed one out (from a file I have, can't remember where I got it), glued it to some thin cardboard with a gluestick and applied some clear packing tape to provide a protective layer. For the piston stop tool, I made one similar to the one pictured in Haibeck's LT5 timing article out of an old spark plug and a phenolic/fiberglass rod. I tried to drill a hole through the spark plug, but couldn't, so I just cut a slot in the side with a cut-off wheel on an angle grinder to provide an air hole. I filed all the sharp edges down around where I cut so that the spark plug hole in the head would not get damaged. 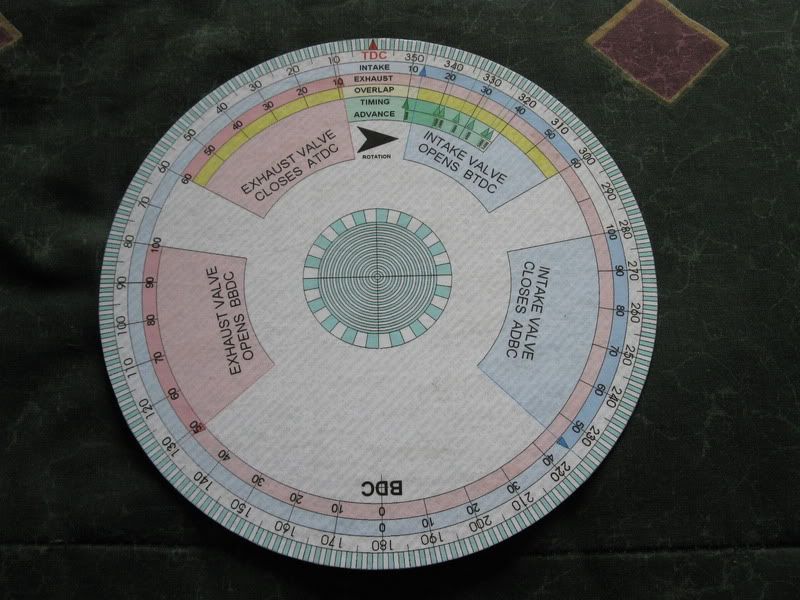
__________________
[IMG]http://i13.photobucket.com/albums/a292/bdw18_123/_zr1netforumsigphoto.jpg[/IMG][B] 1990 Corvette ZR-1 [/B][I] White/Flame Red, #2299, mostly stock, 144K miles.[/I] -Cams timed to the '93-'95 405HP LT5 stock timing. -IAT sensor relocated to below front bumper. -Haibeck hoops installed in airduct. -OBX cat-back exhaust. [COLOR=DarkRed][B](SOLD - December 2012 [/B][/COLOR][COLOR=DarkRed][B]:hello:)[/B][/COLOR] 1993 Corvette Coupe Black/Black, 6-speed (SOLD - October 2009 :hello:) |
|
|
|
|
04-07-2011
|
#120 |
|
Join Date: Apr 2009
Location: Prather, CA
Posts: 809
|
 My next update will be on the actual timing process.
__________________
[IMG]http://i13.photobucket.com/albums/a292/bdw18_123/_zr1netforumsigphoto.jpg[/IMG][B] 1990 Corvette ZR-1 [/B][I] White/Flame Red, #2299, mostly stock, 144K miles.[/I] -Cams timed to the '93-'95 405HP LT5 stock timing. -IAT sensor relocated to below front bumper. -Haibeck hoops installed in airduct. -OBX cat-back exhaust. [COLOR=DarkRed][B](SOLD - December 2012 [/B][/COLOR][COLOR=DarkRed][B]:hello:)[/B][/COLOR] 1993 Corvette Coupe Black/Black, 6-speed (SOLD - October 2009 :hello:) |
|
|
|
 |
|
|


 Linear Mode

