
|
 08-20-2013
|
#21 | |
 Join Date: Oct 2004
Posts: 1,889
|
Quote:
If you can get just a 17mm hex in the plug you might try using a bottle jack to keep pressure on it and then a box wrench with a cheater to loosen it. Last edited by WVZR-1; 08-20-2013 at 06:42 AM. |
|

|

|
|
08-20-2013
|
#22 |
|
Join Date: Jun 2013
Location: Toronto
Posts: 782
|
I tried putting a jack under the torque wrench the first time i attempted this last week ..to keep the angle straight with as little pressure as possible .. The torque wrench was set to 140 lbs-ft or so and it clicked :I .. And then started to round out the hex inside the plug. Because I did remove the speedo and plop half a quart out that time I did get the fill plug open and I topped it up with Amsoil.
Can't thank you guys more for your input  I didn't see the bolts on the lower shields so I decided to just stop there . The shield was curved around the manifold at the front end if the motor. I had to removed the black large nut near cyl 1 on the air assembly and leverage the air tubes a bit which raised the motor slightly to get it to slide out. After that it wouldn't go up or down. I didn't see the bolts on the lower shields so I decided to just stop there . The shield was curved around the manifold at the front end if the motor. I had to removed the black large nut near cyl 1 on the air assembly and leverage the air tubes a bit which raised the motor slightly to get it to slide out. After that it wouldn't go up or down.Ill work on the cat shield first when I get home. I shot all visible bolts with a tiny bit of penetrant hopefully it helps a little tonight when I continue the attack. All I can say is I'm happy I got the air delete. What a mess of tubing and piping. Just curious will it trigger a code if removed? I'm thinking to leave the pump alone up front until I can get the chip in (someonel forgot to mail it 3 weeks back ! o_O) so it can pump away into nothing and not trigger a code? Not sure if that will work in theory. Will also pick up some tools on the way home. My large tool box is at my parents home with my 93 but so far MacGyver'ing every job has seemed to work well with just a decent socket set And various tools. |
|
|
|
|
08-20-2013
|
#23 | |
  Join Date: Aug 2009
Location: South Dakota/California
Posts: 3,788
|
Quote:
Let me get this straight.....Did you strip the Trans Drain Plug and NOT get it out? And...if so...did you catch the "drill it out" technique? What is going on here is extremely helpful that you post up ALL your issues as it helps define a method to remove Stock Exhaust Systems and install Headers for others 
Last edited by Dynomite; 08-20-2013 at 10:07 AM. |
|
|
|
|
|
08-20-2013
|
#24 |
|
Join Date: Jun 2013
Location: Toronto
Posts: 782
|
That's awesome ill be unplugging and pulling the whole setup then. I did see the t connection and did the same thing you mentioned that I saw in the info links. Ill take a photo of it so people can see it.
Just to be clear the drain plug had nothing to do with the header install. I tried doing a trans fluid change earlier last week When doing the short shifter, beam plates and corsa car back. for anyone following just for headers ignore the drain plug talk. I have a thread going on CF where I've been documenting the buildup since I picked up the z here.. http://forums.corvetteforum.com/c4-z...ods-begin.html I have a photo of the drain plug on page 3 post 58 I think. I will end up drilling it out. Or maybe taking it somewhere to be done when I drop the trans for the alum flywheel and clutch. |
|
|
|
|
08-20-2013
|
#25 |
|
Join Date: Aug 2009
Location: South Dakota/California
Posts: 3,788
|
When you have your drill out install a differential drain plug.
 Tech Info - LT5 Added Systems LT5 Added Systems You are doing great and excellent questions that will help others that do not type as fast as you  This from my IPhone 4s which has a great camera to take any photos you might need of either a 90' or 91' Last edited by Dynomite; 08-20-2013 at 02:58 PM. |
|
|
|
|
08-20-2013
|
#26 |
|
Join Date: Aug 2013
Location: Holland
Posts: 80
|
I am following this topic, last week I was installing a 368 with headers in my car, and when I come home from sea. The plan is to install a set of stainless works headers with B&B exhaust under the Z from a friend.
So this is really helpfull �� Last edited by Jitse; 08-20-2013 at 01:19 PM. Reason: Add some words |
|
|
|
|
08-20-2013
|
#27 | |
|
Join Date: Jan 2012
Location: Wisconsin
Posts: 882
|
Quote:
|
|
|
|
|
|
08-20-2013
|
#28 |
|
Join Date: Jun 2013
Location: Toronto
Posts: 782
|
Ok round 2 begins
Here is a photo of the air system component that mounts beside the and/tc unit that is one of the first things removed. It has a vacuum line attached. 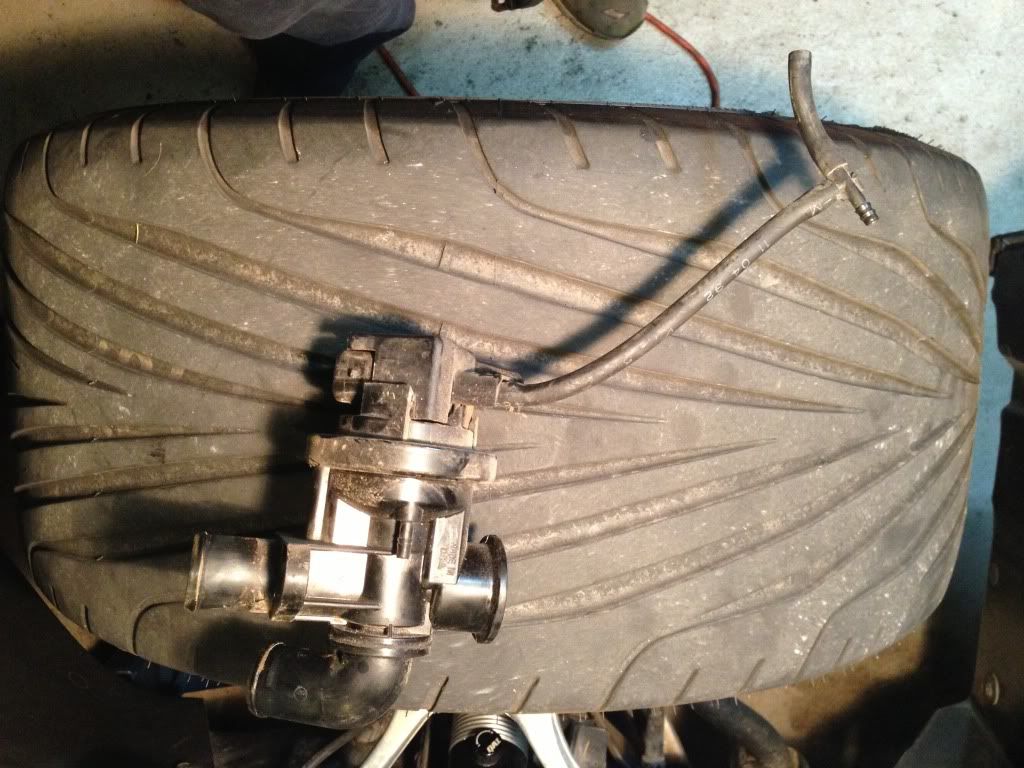 Shown In this photo is the air system piece removed and the vacuum line reconnected to the 'y' fitting. So the 't' fitting is basically removed from the system. There is white foam under the lines to help make it clear in this photo. 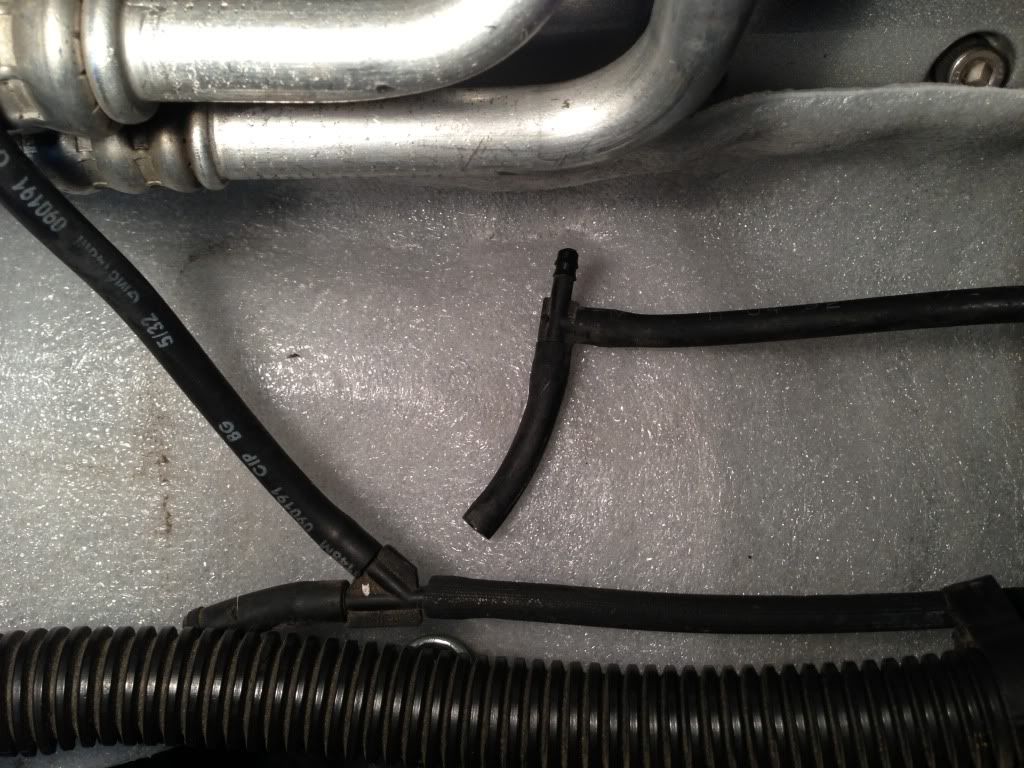
|
|
|
|
|
08-21-2013
|
#29 |
|
Join Date: Jun 2013
Location: Toronto
Posts: 782
|
No problem at all !! Glad its of any use pictures really seem to help me before I dive in to start a job so its the least I can do.
Good news!!! Drivers side manifold is out I'm tired and don't like installing when my eyes are burning lol.. Removing is ok but not putting together. I'm going to stop for the night and take care of the passenger side tomorrow . I have a feeling its going to be more difficult on that side am I right? Pics coming shortly !!! |
|
|
|
|
08-21-2013
|
#30 |
|
Join Date: Jun 2013
Location: Toronto
Posts: 782
|
Ok here's some pics I took.
AIR tube crossover. 2 screws on the oil pan I put the screws back in after  SHot from below of the plates/shields. The closer one looks like a shield for a knock sensor or oil pressure maybe? One screw and it wiggles out. the one in the back had a 3rd screw besides the 2 visible ones (along oil pan rail) that took me a bit to figure out.  A shot from over the cat. This is the 3rd screw holding the cat shield. same 10mm. took me a bit to find the sucker   Just another upwards shot.. enough room to put a 1/4 extension and deep socket on it and screw it loose.  There is also a shield that goes along the floor opposite the motor. 2 screws again and it comes down and gives a bit more room. Very easy to remove nothing special just wanted to mention it. If I remember right it shields the brake lines going to the rear. Once the shields are all out.. I did spend some time trying to unbolt the cat from the manifold. I got all the bolts loose except one and then realized it wasnt getting in the way of any bolts that I could see and I left it. Dont bother trying to remove it it really isnt in the way . Nice view ... Looks SO easy now.. and it was. 
|
|
|
|
 |
|
|


 Linear Mode

