
|
 03-29-2011
|
#101 |
|
Join Date: Jan 2011
Location: Eastern Iowa
Posts: 113
|
Hey nice work on the whole car, it looks great! If you find out what is wrong with that 3rd brake light let me know mine isn't working either. If I do find out what is wrong with mine I'll send you a PM.
|

|

|
|
03-29-2011
|
#102 |
 Join Date: Jul 2007
Location: Bartlett, IL
Posts: 7,155
|
did you check the 3rd brake light Switch? it may not be making contact at the pedal.
There is a connector in the pass foot well area then another in the right halo near the Cargo light before the final connector up by the hatch passthru for the wiring
__________________
1990 Corvette ZR-1 #1051 Watson Headers (2" Primary) - Flowmaster Cats - Borla Catback Late Model IH - Plenum Coilovers - 4.10s Custom Interior NCM Lifetime Member #978 |
|
|
|
|
03-29-2011
|
#103 |
|
Join Date: Jan 2011
Location: Eastern Iowa
Posts: 113
|
Thanks Jeff it sounds like overkill on GM's part on the switches to me. I'll have a look and see what I come up with.
|
|
|
|
|
03-29-2011
|
#104 | |
|
Join Date: Jul 2007
Location: Bartlett, IL
Posts: 7,155
|
Quote:
even my 92 Firebird had a separate switch for the CHMSL I think the reason was it is just a stop light and not a turn or hazzard.
__________________
1990 Corvette ZR-1 #1051 Watson Headers (2" Primary) - Flowmaster Cats - Borla Catback Late Model IH - Plenum Coilovers - 4.10s Custom Interior NCM Lifetime Member #978 |
|
|
|
|
|
03-29-2011
|
#105 |
|
Join Date: Jan 2011
Location: Eastern Iowa
Posts: 113
|
OK you lost me with CHMSL, I'm new to this stuff so you have to explain. I'll give it a shot.... Corvette High Mount Signal Light? LOL
|
|
|
|
|
03-29-2011
|
#106 |
|
Join Date: Mar 2009
Location: Orlando, FL
Posts: 1,828
|
Center High Mount Stop Lamp
|
|
|
|
|
03-29-2011
|
#107 |
|
Join Date: Apr 2009
Location: Prather, CA
Posts: 809
|
Now look what you guys did, cluttered up my thread!
 Maybe Z Factor can move your posts about the 3rd brake light to a separate thread? Not a huge deal though.
__________________
[IMG]http://i13.photobucket.com/albums/a292/bdw18_123/_zr1netforumsigphoto.jpg[/IMG][B] 1990 Corvette ZR-1 [/B][I] White/Flame Red, #2299, mostly stock, 144K miles.[/I] -Cams timed to the '93-'95 405HP LT5 stock timing. -IAT sensor relocated to below front bumper. -Haibeck hoops installed in airduct. -OBX cat-back exhaust. [COLOR=DarkRed][B](SOLD - December 2012 [/B][/COLOR][COLOR=DarkRed][B]:hello:)[/B][/COLOR] 1993 Corvette Coupe Black/Black, 6-speed (SOLD - October 2009 :hello:) |
|
|
|
|
03-31-2011
|
#108 |
|
Join Date: Apr 2009
Location: Prather, CA
Posts: 809
|
With the liner and piston ring issues taken care of, I moved on to getting the heads installed.
Before doing that though, I decided to remove the crankcase breather cover, remove the old gasket and get the gasket surface cleaned up. There was oil in a lot of the screw holes, which had to be cleaned out so that the loctite would be able to seal properly. I just turned the engine upside down and sprayed out the holes with carb cleaner (because I already had a can of it). 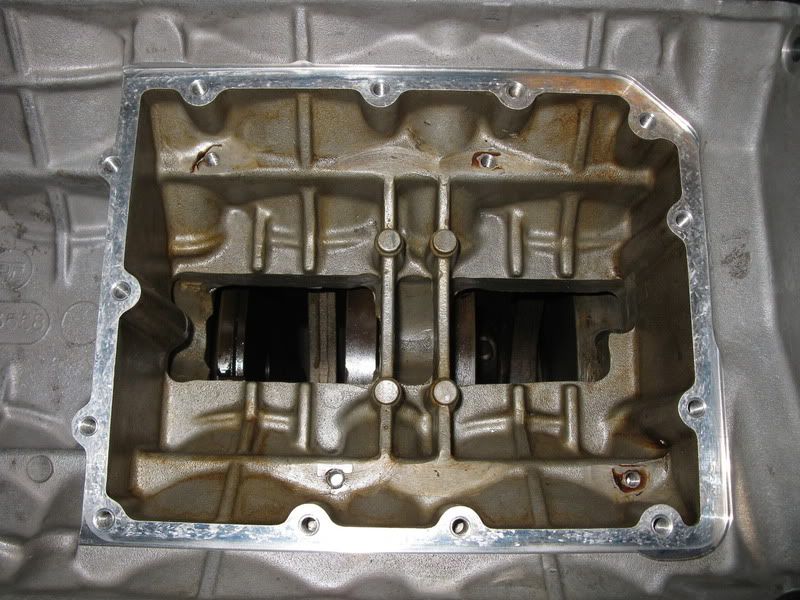 Now, on to the head installation. First thing I did was get the head gasket surface area of the block cleaned up really good. I used a plastic scraper first to get the worse of the old gasket material off. Then I used some carb cleaner on a rag to scrub the surface. After that I used some scotch-brite to get the rest of the stubborn areas that didn't want to come off. I finished off with another wipe-down of the surface with the carb cleaner. For the tops of the liners, I only used the carb cleaner and the plastic scraper. I used the scotch brite lightly on a few small areas between the liners where a tiny bit of corrosion had started. 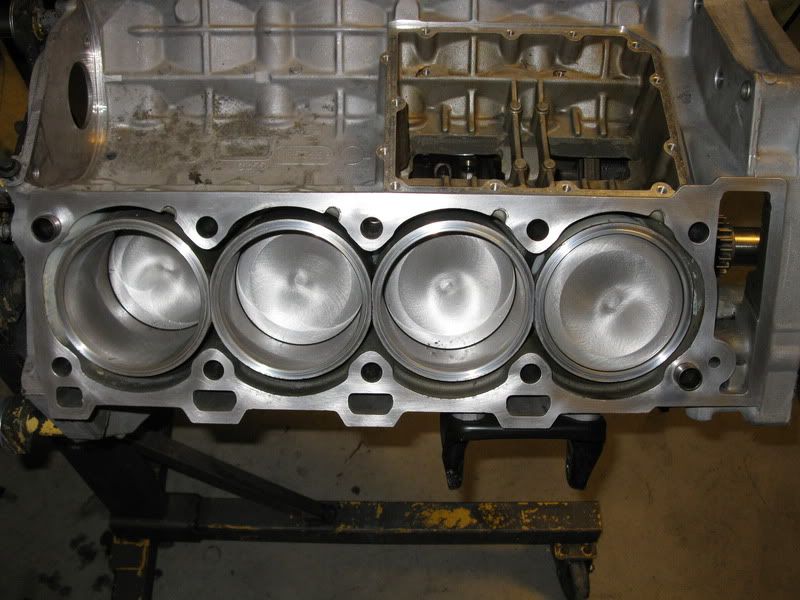 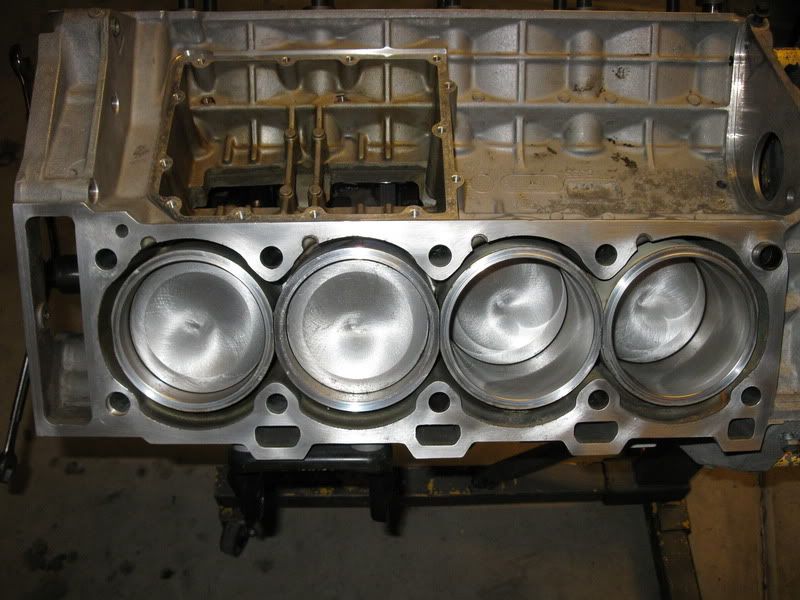 The head gaskets I have are new OEM ones that I bought from Jerry awhile back. This was before he had his own head gaskets manufactured. I didn't know how long that would take and didn't want to be hung up on head gasket availability. Jerry at the time had 2 right hand GM head gaskets left and since you can use the right hand one on the left side, I bought his last two RH OEM ones which he gave to me for the RH & LH set price. Here you can see the extra part of the RH gasket that has to be cut off when used on the LH side. 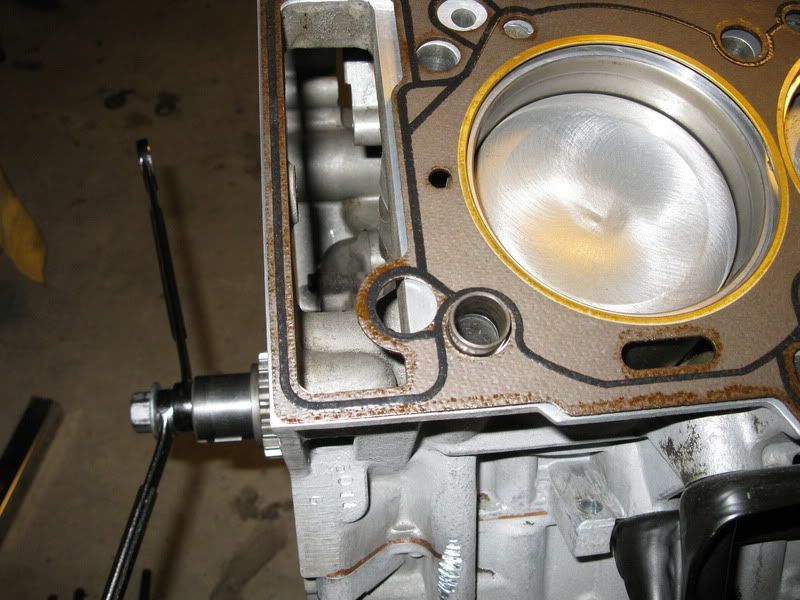 Gasket in place on LH side; the extra part is cut off. 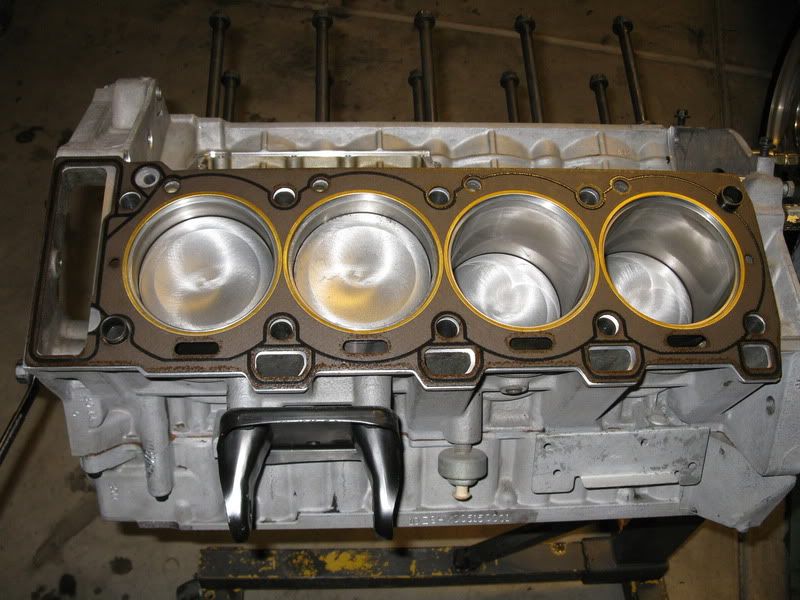 With the gasket in place, I set the LH head in place. The dowel/sleeves are pretty tight fitting so it takes a bit of effort to get it lined up & in place, especially with how heavy the heads are. I then just followed the procedure in the service manual. Put engine oil on the head bolt threads and washers, then torque them in three stages to the values specified and following the proper tightening sequence each time. LH head installed and torqued down. 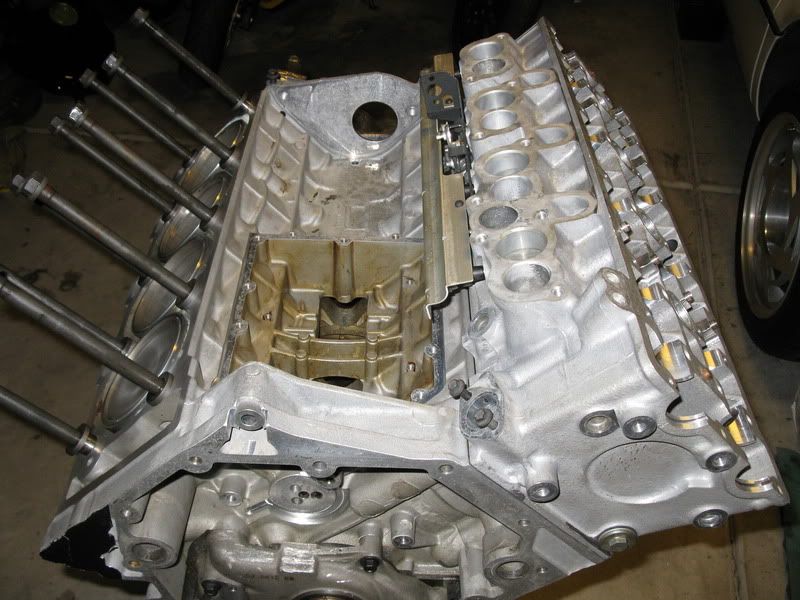
__________________
[IMG]http://i13.photobucket.com/albums/a292/bdw18_123/_zr1netforumsigphoto.jpg[/IMG][B] 1990 Corvette ZR-1 [/B][I] White/Flame Red, #2299, mostly stock, 144K miles.[/I] -Cams timed to the '93-'95 405HP LT5 stock timing. -IAT sensor relocated to below front bumper. -Haibeck hoops installed in airduct. -OBX cat-back exhaust. [COLOR=DarkRed][B](SOLD - December 2012 [/B][/COLOR][COLOR=DarkRed][B]:hello:)[/B][/COLOR] 1993 Corvette Coupe Black/Black, 6-speed (SOLD - October 2009 :hello:) |
|
|
|
|
03-31-2011
|
#109 |
|
Join Date: Apr 2009
Location: Prather, CA
Posts: 809
|
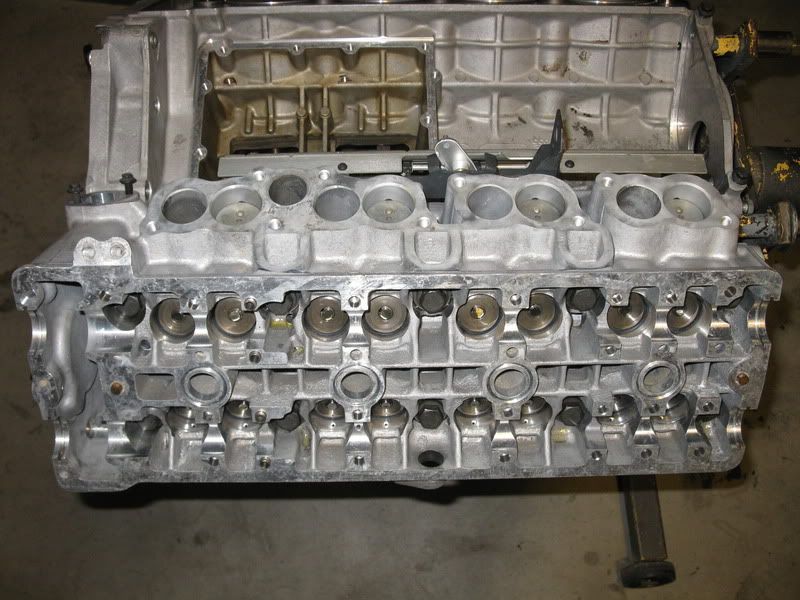 Nothing needed to be done to the other RH gasket, so I just set it in place. 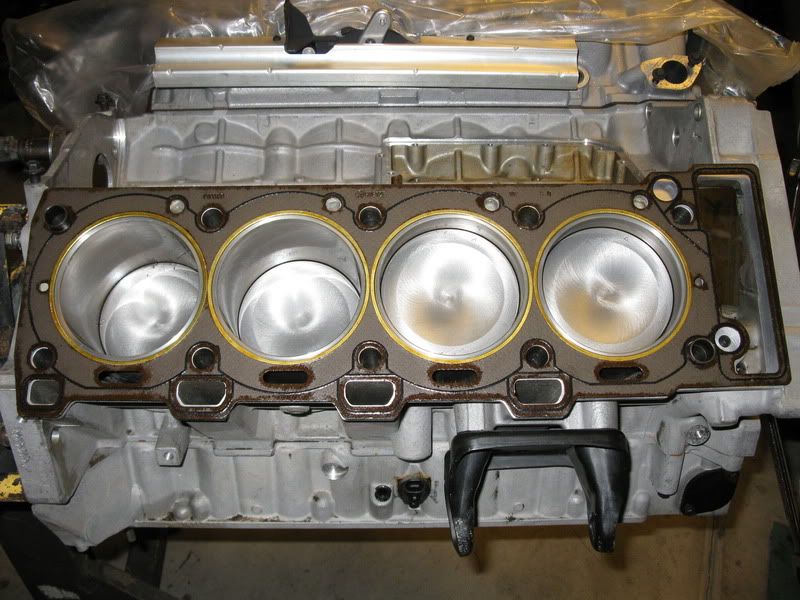 And then the same procedure for the RH head as the LH head. RH head installed and torqued down. With both heads back on, it's starting to look like an LT5 again! 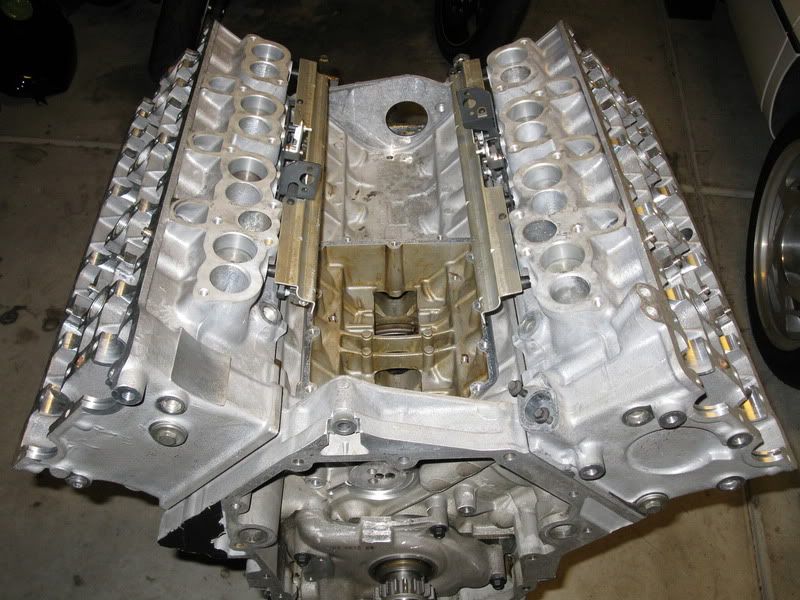 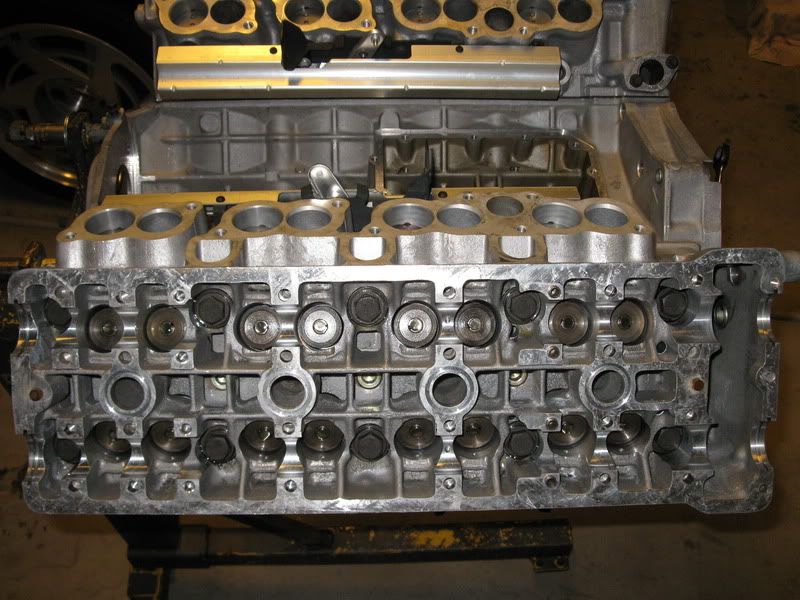
__________________
[IMG]http://i13.photobucket.com/albums/a292/bdw18_123/_zr1netforumsigphoto.jpg[/IMG][B] 1990 Corvette ZR-1 [/B][I] White/Flame Red, #2299, mostly stock, 144K miles.[/I] -Cams timed to the '93-'95 405HP LT5 stock timing. -IAT sensor relocated to below front bumper. -Haibeck hoops installed in airduct. -OBX cat-back exhaust. [COLOR=DarkRed][B](SOLD - December 2012 [/B][/COLOR][COLOR=DarkRed][B]:hello:)[/B][/COLOR] 1993 Corvette Coupe Black/Black, 6-speed (SOLD - October 2009 :hello:) |
|
|
|
|
03-31-2011
|
#110 |
|
Join Date: Jan 2011
Location: Eastern Iowa
Posts: 113
|
Looks sweet! I like all the good pics you're posting with your build.

|
|
|
|
 |
|
|


 Linear Mode

